I’ve briefly gone over my journey so far, but in this post I want to go more into detail on a few of the resources I’ve utilized. And though I’m sure I could’ve added more, I’ll focus on three subheadings for now;
- Youtube tutorials
- Art course
- Books
Organized to a degree in the order I began using them.
I’ll briefly go over my perspectives and what I like about doing art to give some context for what worked for me and why, as I’m sure some of it isn’t relevant for someone aiming for other aspects of art. I like making new things. I like designing characters, I like creating creatures and objects that don’t exist, I like building worlds, and I like adapting things. Realism isn’t something I’m terribly interested in – that’s also reflected in the media I consume, contemporary or even historical fiction that doesn’t add in some elements of magic, mysticism or new technology don’t really ignite much in me. I don’t know if I’m more interested in going into concept art, animation, commission work, or whatever else yet, just that I want it to be weird.
Without further ado, we’ll start with Youtube tutorials.
Marc Brunet and Ethan Becker

Ethan Becker (Left) and Marc Brunet (Right)
When I was looking for places to start relearning the basics, I first went to YouTube. I’d already watched Marc and Ethan’s videos on occasion in the past, mainly to learn very specific things, so I knew that I at least enjoyed their styles of teaching.
Marc Brunet (right image) used to work as an artist at Blizzard Entertainment. He has a paid art course, as well as what he calls ‘YouTube Art School’, where he uploads free videos to his channel weekly going over different topics. He’s been great for structured learning, with several of his videos being split into different skill levels, going over roughly how long you should do one step before moving onto the next, etc. Overall, Marc Brunet’s tutorials are very comprehensive, and are good at showing how to do construction, anatomy and shading.
Ethan Becker’s tutorials are more bite-sized. He’s worked in animation at Dreamworks, so a lot of his tutorials are more aligned towards action, creating realistic/dynamic motion, making designs that are compelling yet simple enough to animate, and to break down other drawings into shapes. There’s less of a structured through-line in his tutorials, delivered with some self-deprecating faux bravado and humour.


I’m still not sure where my art journey is taking me. Working with game art/concept art, working with animation, or just doing commission work for people, all seem like interesting career paths for me. In that sense, having these two very different styles of tutorials is nice because I get to switch a bit how I think from one way to another, which my ADHD very much appreciates.
From these two, I’ve learned a lot about deconstructing drawings and styles, creating styles for purposes, the basics of construction, perspective, foreshortening, different methods of sketching, making lineart and shading, choosing colours.. Overall, they’ve been pretty much perfect for me. However, I realized I wanted a more direct course to give me a direction to work in, but since Marc’s tutorial is a bit out of my price range, I checked udemy.com for courses.
The Ultimate Digital Painting Course
by Jaysen Batchelor and Austin Batchelor

The course header from Udemy.com
Udemy is the course portal my work training programme utilizes. After looking through the different courses available, this course by siblings(?) Jaysen and Austin Batchelor caught my eye. I put in the request, the company bought the course, and I got to work. I got through a lot in the first couple of weeks of using the course – I practically didn’t do anything else for one of those weeks during work training. This course is extremely comprehensive, going from describing the basics of how digital brushes work, to colour theory, to advanced lighting, perspective, character design, etc. I can’t go over everything in this one post, partially because I also haven’t finished the course yet, but I’ll go over some of the things I’m happiest about so far.


In the first parts of the course, you’re walked through, step-by-step, how to draw an eye, and a twisting tree. You’re given colour palettes to use and told what tools they recommend you use for these specific pieces. For the eye, the focus was on manual blending – not using smudge tools or soft brushes, but using hard, round brushes and colour-picking tones in between until it looks good. I was frustrated with this at first, as I knew how to use blur tools, smudge tools and soft brushes, but it made more and more sense the more I did this. The point wasn’t the end result, the point was how to think about the colours in the scene, and how to transition from one colour to another without it looking unnatural or muddy.
The next part I really enjoyed was perspective. One- and two-point perspectives are things we went over in primary school art class – though I appreciated the refresher as I of course hadn’t done any of it since. Three-point perspective sprung on me like a jack-in-a-box, though. I knew what it was, but I hadn’t ever actually tried it. I thought it’d be roughly the same as two-point. To a degree, I was correct, but there’s more to keep track of – At some angles it gets harder and harder to tell which corner should be going towards which vanishing point. I needed to re-watch the lecture a few times before it finally clicked, but it was so satisfying when it did.


The two images above are from a task about directional lighting, and a task about manual blending. The blending task was much like the eye task above, except instead of being given some tones between, it gave two tones and simply had you manually blend the two until the transition was smooth-ish. Now, how smooth this looks varies wildly from monitor to monitor. On my current monitor, I can see it’s not as smooth as it looked on the one I worked on this task on.
The other image, the three similar shapes, was a directional lighting challenge. ‘Here’s a flat figure, imagine it in 3D, and then imagine a light source’. This task was really fun, thinking how the different parts would affect the light and shadows in different ways is a good way to keep my inattentive brain active, as well as just a good way to learn lighting.


The final two parts of this course I’ll go over before telling you to go grab the course yourselves; adding lighting to a drawing and gamut masking.
The frog-creature is the final part of a set of tasks of lighting up provided drawings. To be clear – I did not draw the drawing on the left, it was provided by the course. I simply added the lighting in the second drawing. Working with different light sources (the sun and the eyes), working with subsurface scattering (light passing through the leaf and the ears), it was just a fun task to do, though it took a while to make it feel correct.
Gamut masking is a concept I’d never heard of, but makes a lot of sense. This goes more into colour theory. Instead of going onto Adobe Color or Coolors and grabbing colour palettes, make a colour palette by carving a shape out of a colour wheel, and not using any higher saturation than the outer edges of said shape. In the image above I show a few different examples I did. It’s really nice for helping figure out a good colour palette or just challenging yourself by limiting your colour range.
I’ll link the course at the bottom, I highly recommend it.
If the makers of the course by some miracle stumble across this post, hi! I hope I haven’t revealed too many secrets from the course, but if I have, let me know what to remove!
Books!

Let me start by coming clean: I can count on two hands how many books I’ve finished since 10th grade. I used to be a huge reader in primary school, I’d go through a Goosebumps book a day, I read the Bartimaeus Trilogy, any sort of child or teen fiction I could get my hands on I’d just devour.
That said, these three books have had me hooked since I got them this year. I’ll go over them in order of when I got them;
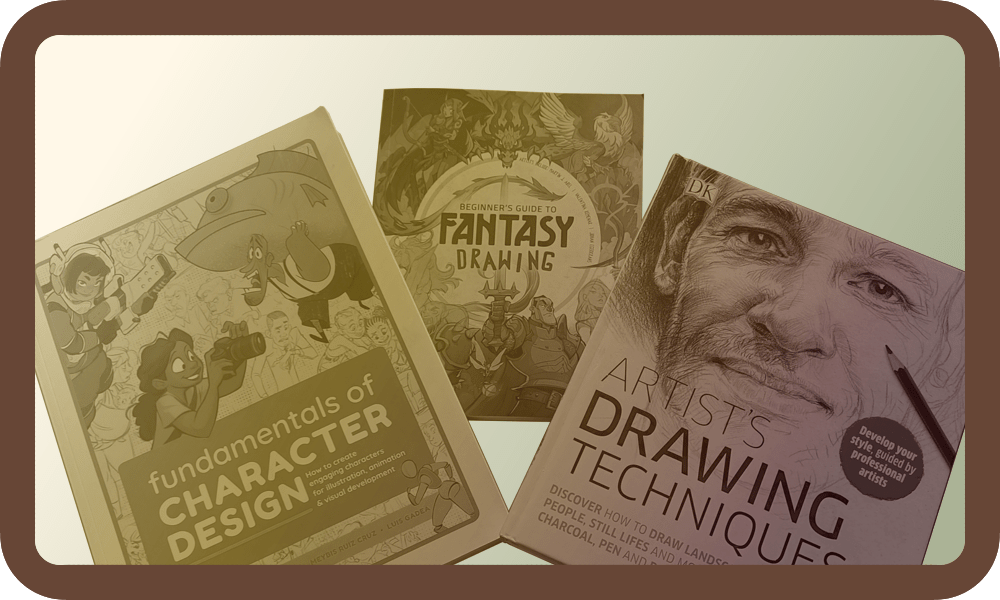
Artist’s Drawing Techniques
I got this book on a whim when I spotted it on a shelf while waiting for a friend to pick out some other books. This book by publishing company Dorling Kindersley is excellent for a lot of the fundamental techniques. The book is built on more traditional drawing tools – Pencils, charcoal, pastels, pens, etc – but as the book itself makes clear, you can utilize these tips digitally as well. What I’ve gotten most out of from this book are texture, methods of sketching, refining sketches, different grips, and just methods of drawing I hadn’t considered. I’m a firm believer that learning a technique you don’t use is still good, as it adds to the perspective of the techniques you do use – and why you don’t use those other techniques. So while I might never use 70% of the tips in this book, I don’t regret learning any of it.
Fundamentals of Character Design
I picked this one up a few weeks ago. This book, by 3dtotal Publishing and a long list of talented artists, is a fantastic compendium for me. This isn’t a ‘how to draw’ book, it’s a book about how to think about drawing – both in the design process and the drawing process – and how to create compelling characters, placing them in scenes, posing them, and so on. From talking about how to do research, to storytelling through character design, to shape and colour language, the importance of silhouettes, lines of action, how to convey age, all through varying degrees of stylized characters, with some of the artists featured in this book such as Dom Murphy or Stephanie Garcia Rizo having heavily stylized characters that can sometimes be summarized with a single shape, to Kenneth Anderson or Meybis Ruiz Cruz doing more realistic proportions for their characters. There’s also libraries for costumes, props, hairstyles and facial expressions that are really useful.
Beginner’s Guide to Fantasy Drawing
This is the newest addition to my pile, also by 3dtotal Publishing, and I haven’t really had time to sink my teeth into the lessons yet. This one is far more specific than the others, being about a genre rather than about a drawing field as a whole. In many ways it’s a miniature version of the previous book I mentioned, having tutorials about some specific fantasy creatures and characters, as well as a lot of information about design principles and art fundamentals.
Anyway, that’s enough from me for now. This post ended up far longer than I was planning, but I hope it at least gave some insights into how I’ve been learning lately!
Finally, I’ll leave links to the creators I’ve mentioned:
Marc Brunet
Ethan Becker
The Ultimate Digital Painting Course
Marc Brunet
Ethan Becker
The Ultimate Digital Painting Course
